If you read my latest bathroom-related post (“To Bathe or Not to Bathe”), you may have seen the title of today’s topic and stopped in your tracks. “Wait, Nadine… didn’t you promise us the final reveal next?”
Yes, I did. And it is technically ready for you to see. BUT… as I browsed through the photos in my phone recently, I realised that I had done exactly what all the TV programmes do wrong — skip right over sharing the hardest, least pretty bits.
The construction phase of a renovation or build project is time-intensive, noisy, messy, can reveal hidden surprises (good and bad), and can take a lot longer than most people have the patience for. Certainly not a 30-minute episode.
Unfortunately, all these things are necessary. Construction is often the only way to get from the space you have right now to the forever home you imagine living in for as long as possible.
So, please accept my humble apologies for the additional suspense, and consider this your behind-the-scenes peek into the realities of renovating and building…
Prepping for Demolition
Not surprisingly, any time you are constructing, you have to do a certain amount of demolition first. This means removing all possessions from the vicinity. It takes work, but there’s a silver lining — there is nothing like a renovation to create a decluttering opportunity!
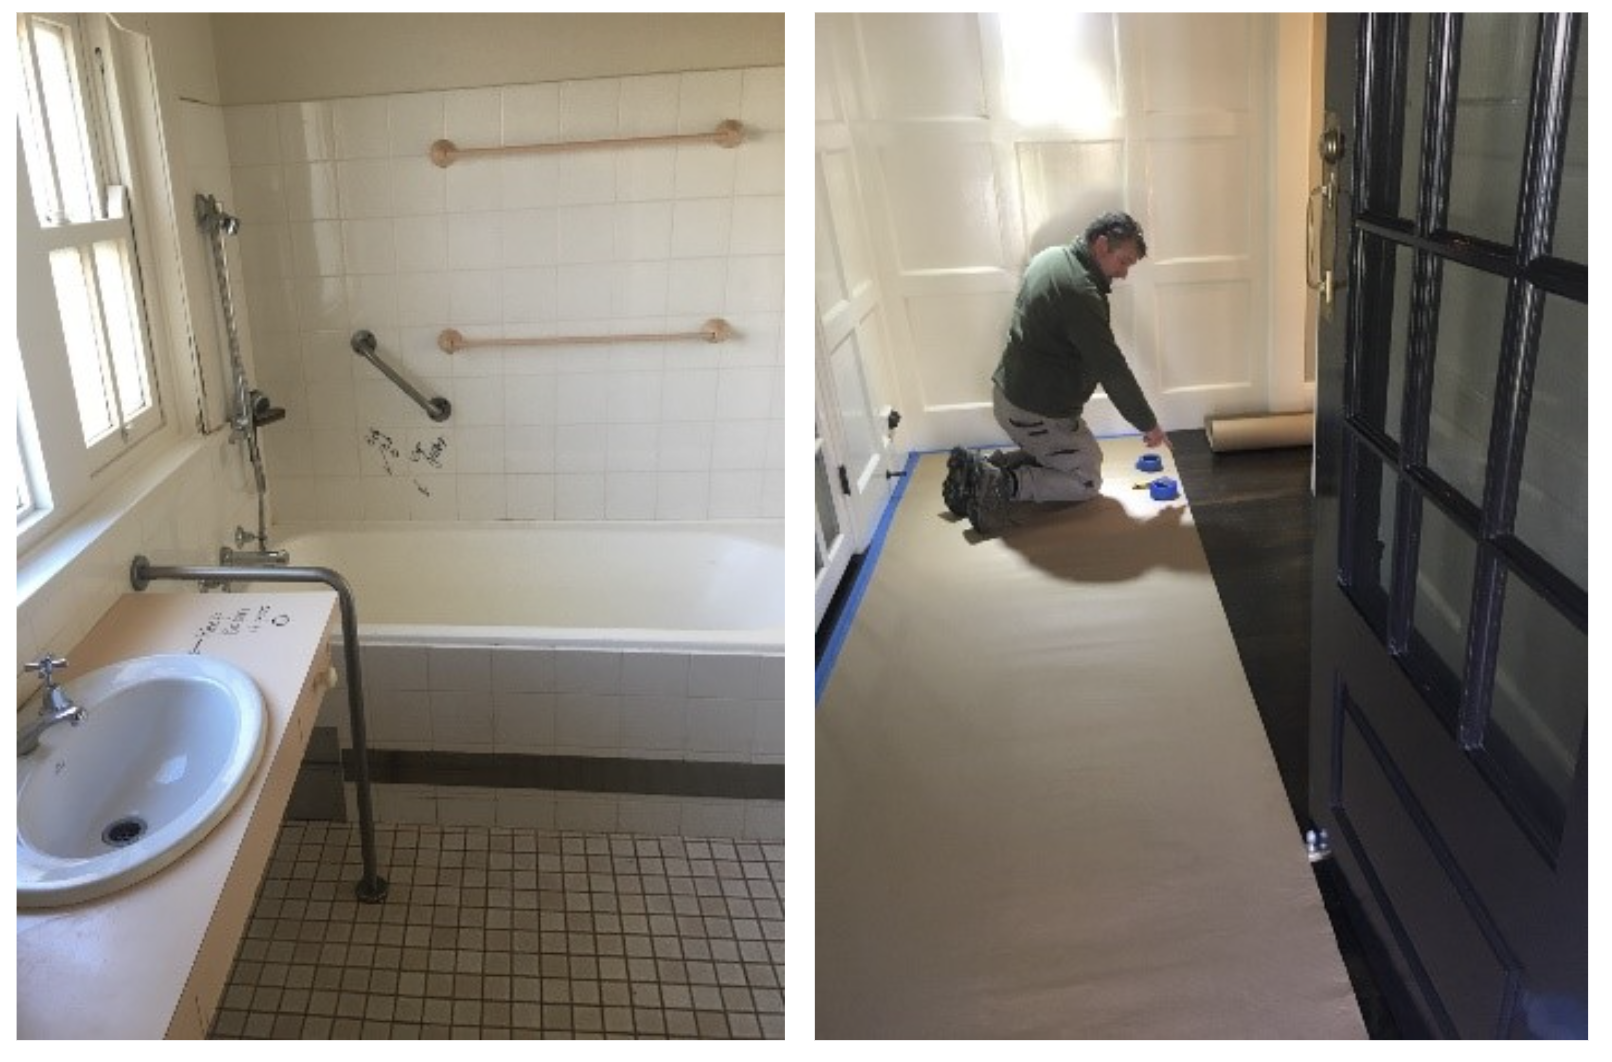
Above, the bathroom is emptied out and our timber flooring in the entry and hallway were protected from foot traffic and debris. Frank the Fiddle Leaf Fig was moved to a hopefully warm spot… he seems to be doing fine, so no harm done.
Then, we were ready for Demo Day. I graffitied instructions on the wall in Nikko pen, asking to keep the basin aside and move the tub to the garden. My lovely builders kindly obliged but struggled with the weight of this old tub. Eventually, they succeeded!

Demo Day & Some Unforeseen Surprises
Demolition Day always results in some ugly photos, and you might be terrified to see what’s under your old tub, walls, or flooring. However, when you remember that THIS is what a dream in progress looks like, it has a beauty of its own. Or, you might say, “Nadine, this is a beautiful scene! I have been waiting years for that hideous sink and tub to exit the building!”
In this case, you have my full support in opening the Champagne early… but not too early. There may be some surprises yet…

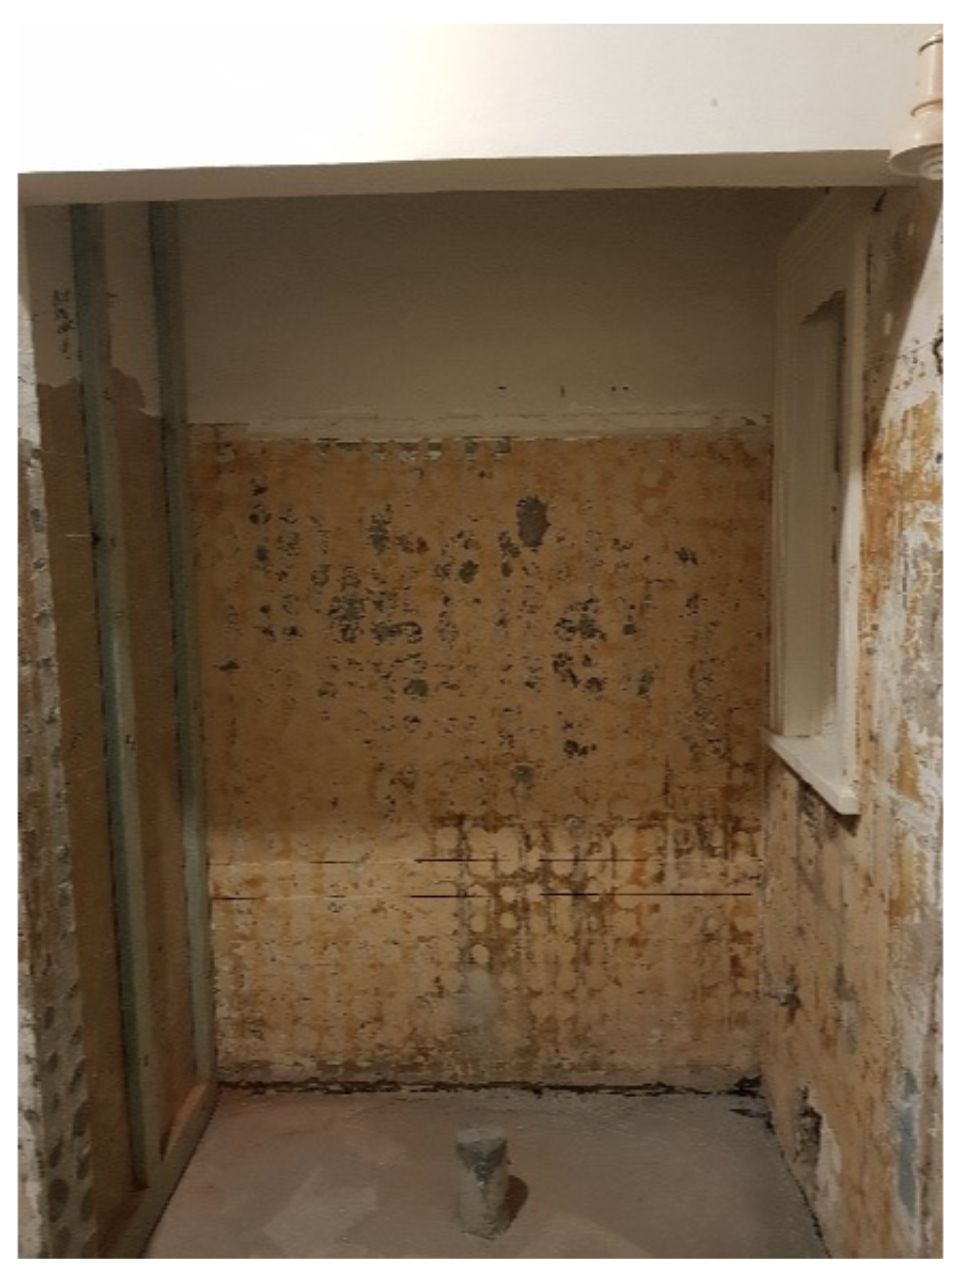
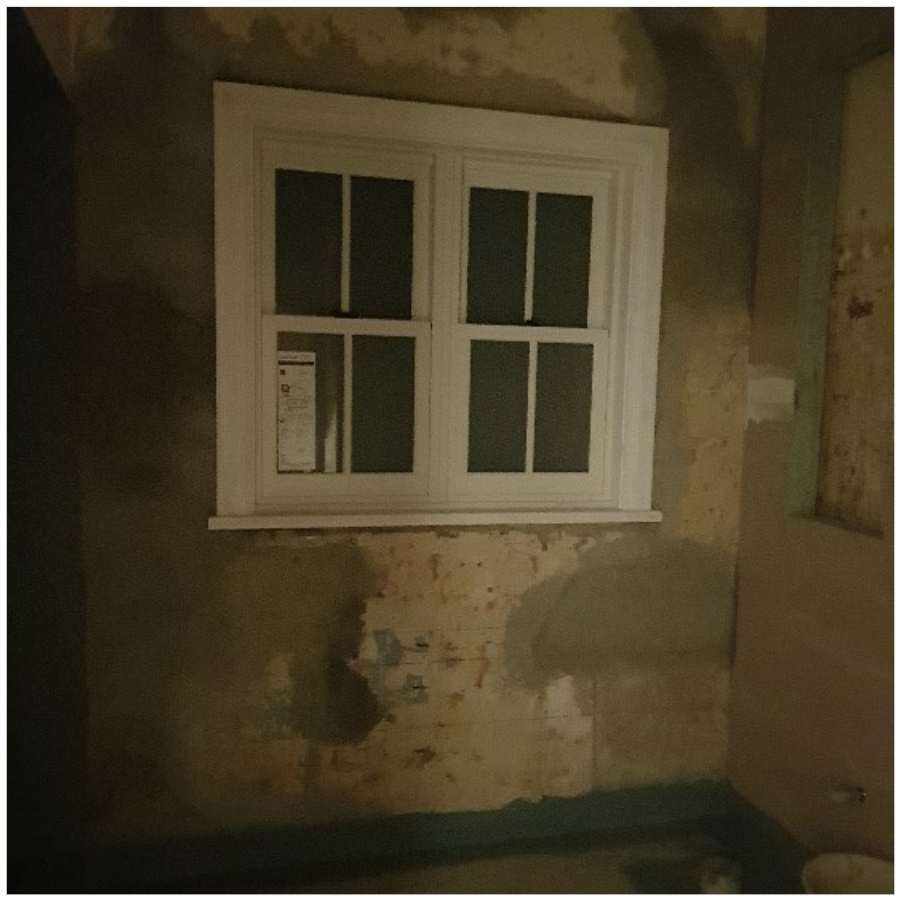
The end of Demo Day. The tiles have been removed from the walls and the plumbing disconnected. I was at work (another reason I left written instructions) and missed all the excitement, but when I came home, there were a few surprises waiting for me…
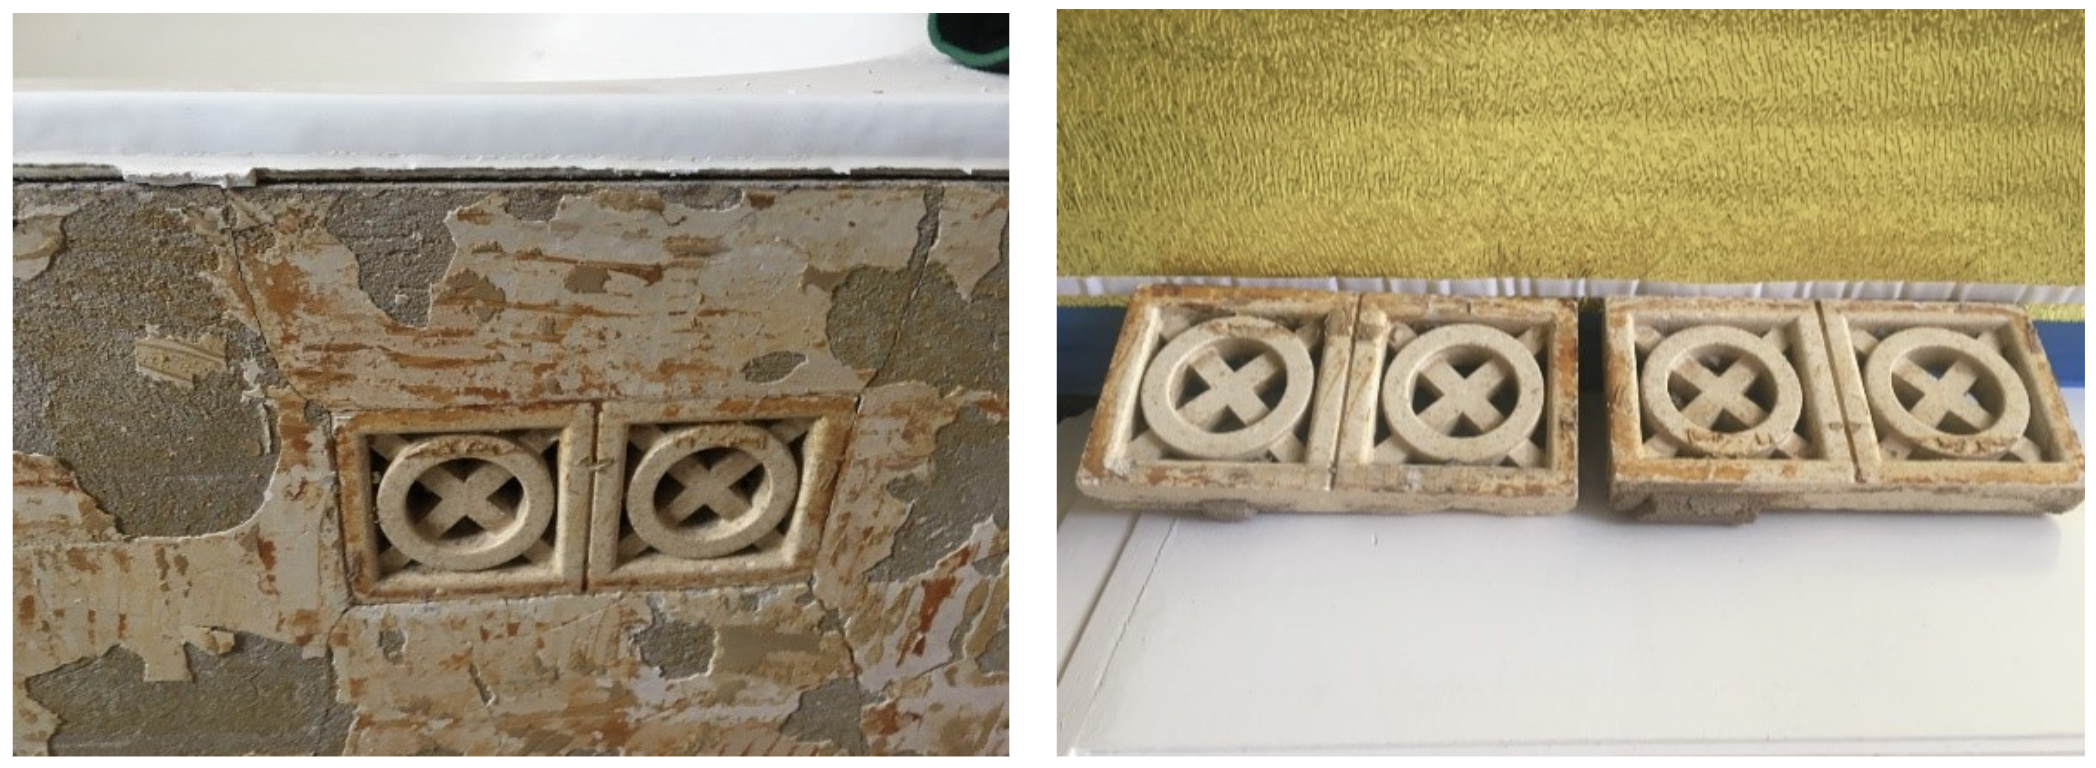
When the tiles were removed, they revealed these original vents with intricate, classic detail! These are the kinds of things you might find when renovating a Heritage home, and they feel like little treasures. I’m sure how to use them yet, but I’ve kept the vents aside for whenever inspiration strikes in a future design project.
Unfortunately, not all the surprises were welcome. The removed tiles also revealed the poor condition of the crumbling walls and the render required remedial work.
Warning: Imagine drilling into this wall if you were installing curtain tracks – it would be like drilling into thin air! On several occasions, we have hit this hidden problem when installing curtains for clients, you just can’t see what’s behind the render till you drill.
The floor was also cut to relocate the toilet drain, and we discovered a new subfloor would be needed because the floor was too thin. $$$$$. A great reminder of the importance of a contingency budget.
The Construction Begins!
What used to be the toilet spot now has a shower drain. The build team also water-proofed all the blue sticky smelly stuff that went on the walls. If you don’t know what that is, it’s okay. Consider yourself lucky. 😉
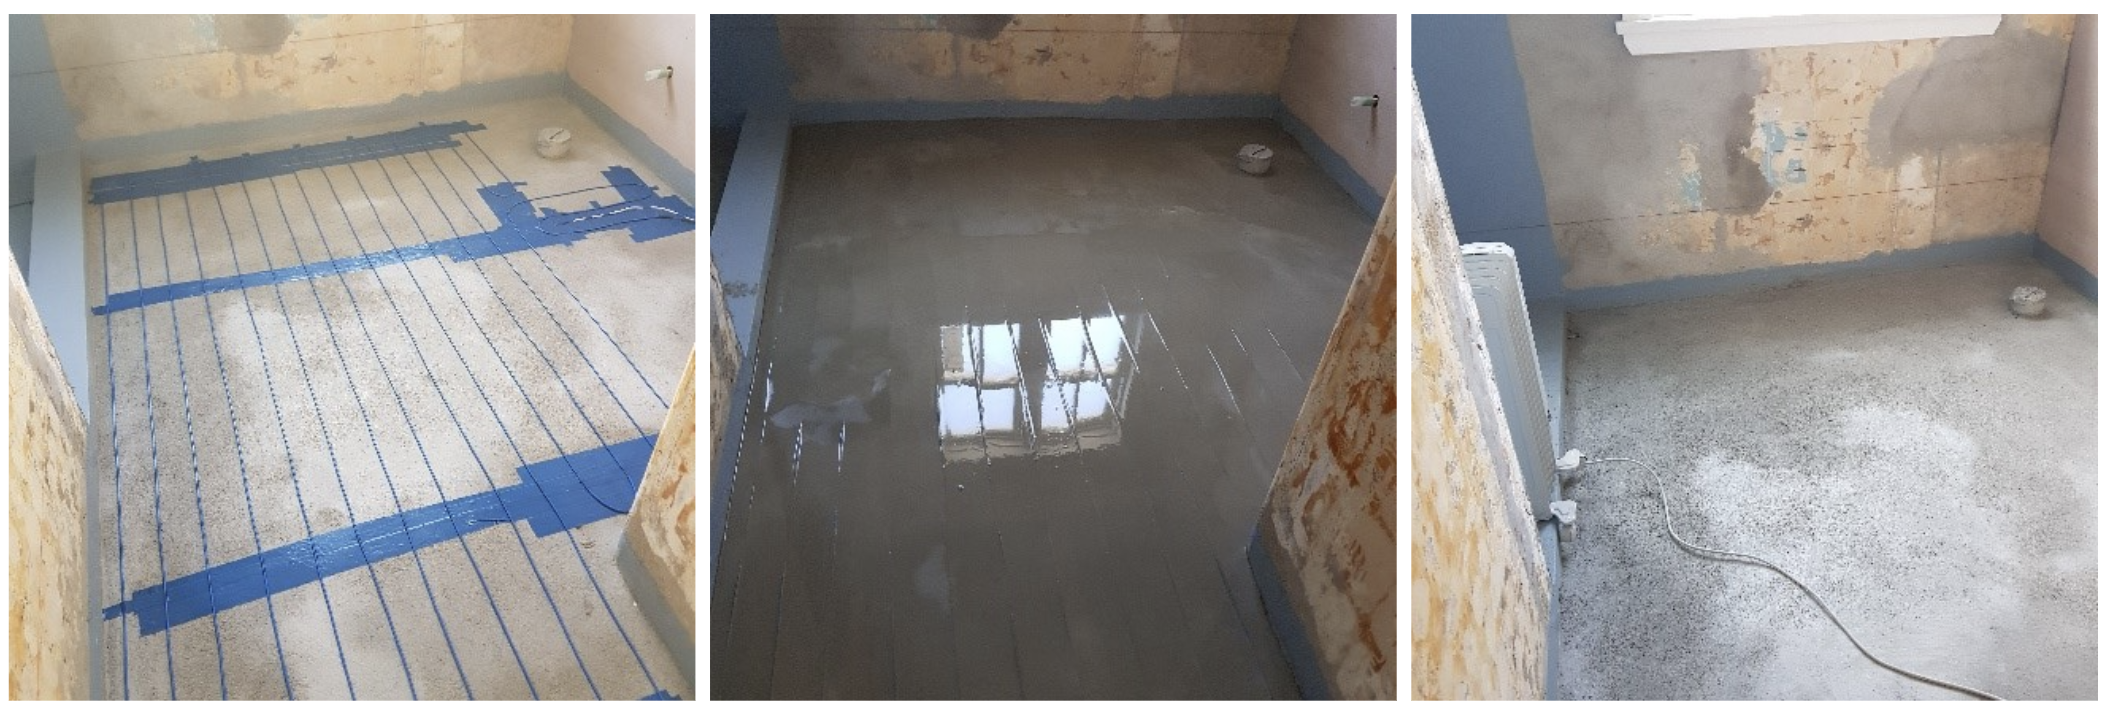
After the new subfloor and water-proofing dried, the underfloor heating (yes, we installed heated floors — it’s cold in Canberra!) and a self leveling screed was applied. That also took some time to dry. You can also see where the walls were patched and re-rendered.
Warning: Lots of drying time between activities = a lot of patience!
Here is a great progression of design from demo to construction! At last, some putting-it-back action:
Grab Your Design Project Planner
Cut through the fluff to discover what you REALLY want done around your home.
This planner helps you prioritise your goals and create an action plan to proceed with design confidence.
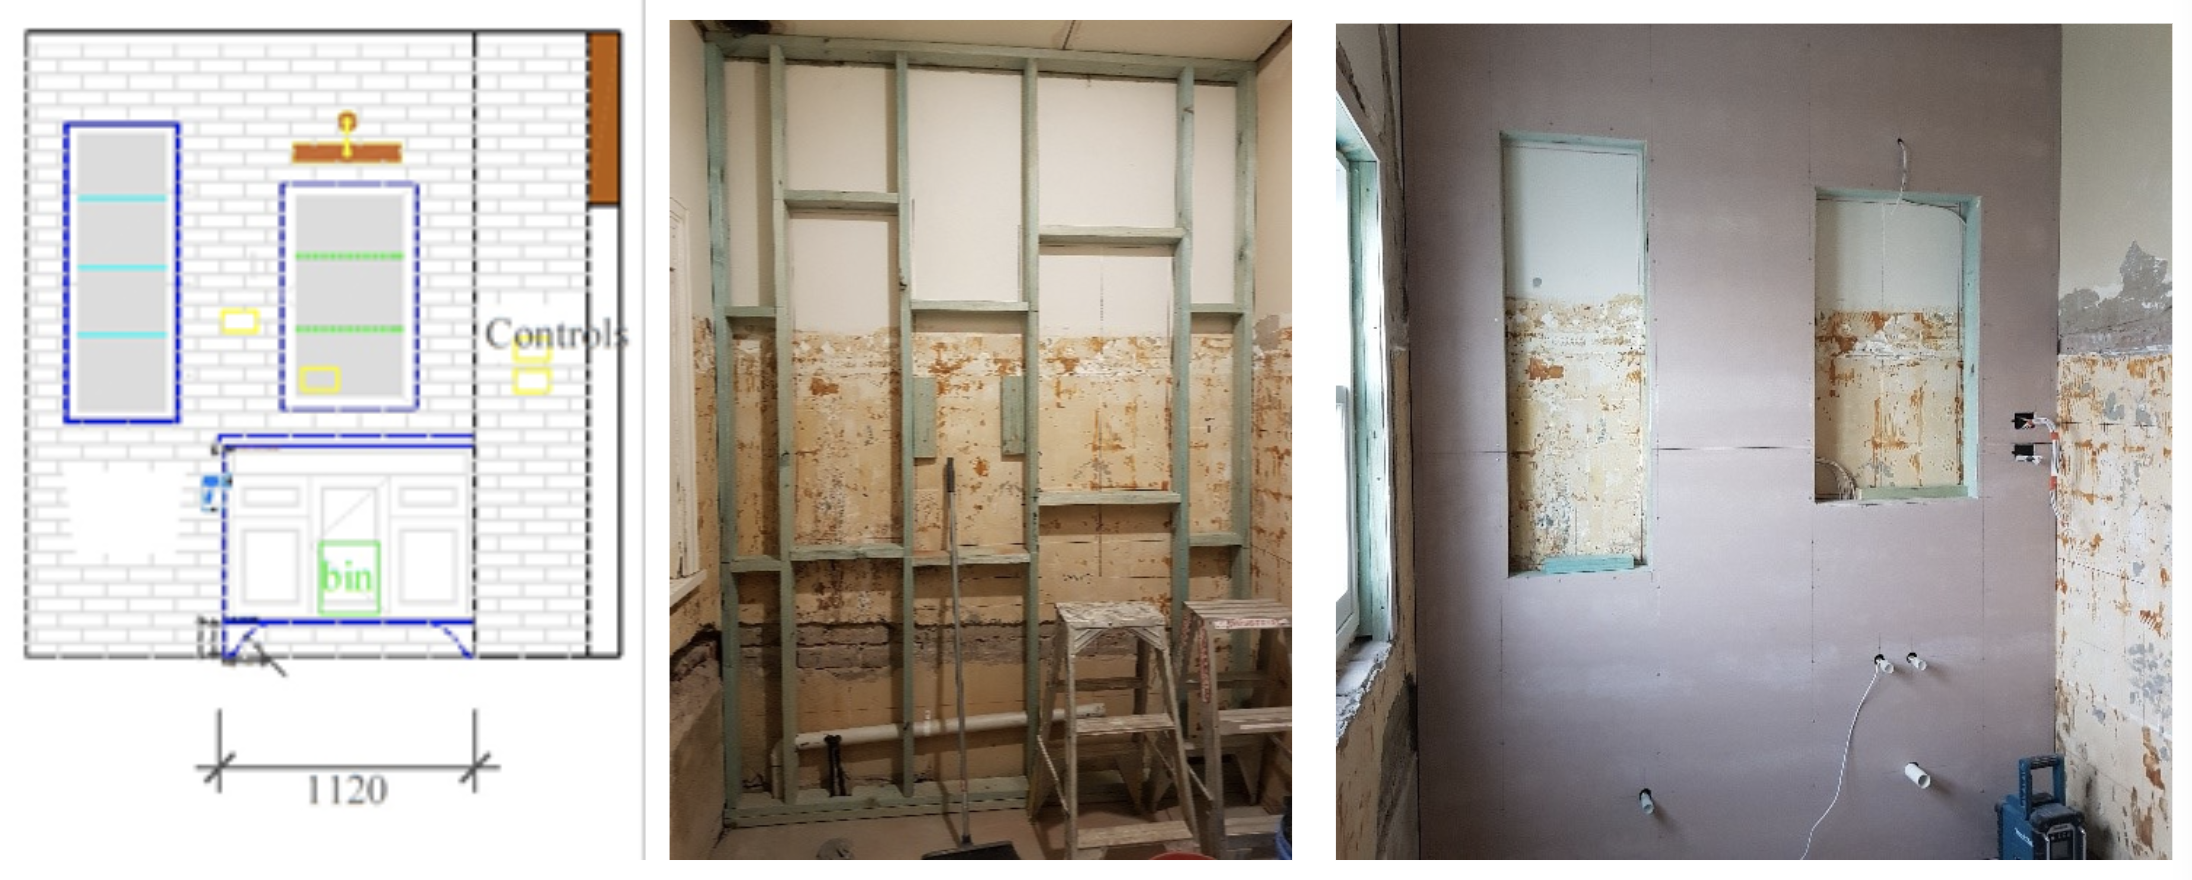
If you remember my design plan, I planned to bring the wall forward to accommodate plumbing and shaving cabinets, so here you can see from the framing how it is starting to take shape.
Note: Even though I drew everything out, my careful builder asked me to check heights of the new niches and the light. This means you or your designer will need to be available during your build for these types of confirmations and clarifications. Building any part of a home requires precision, and is worth checking and double-checking to make sure it’s right!
I had also wanted to put a time capsule in at this point, but alas I didn’t have the time. I was going to include before photos of the bathroom, a record of the house price and a complaint about the local government rates, a COVID mention (you know, something to give the mood of the time), and last but not least, a definite scolding for undoing my timeless beautiful bathroom that was upscale and elegant, as I fully expect this bathroom to last 50 years in both style and endurance! (Fingers crossed.)
Unfortunately, sometimes we get these big ideas that we have to let go of to focus on what is really important… which was making sure the bathroom was coming together properly. I suppose that was more important than scolding future generations. 😉
It’s always a major step when the new bathroom window and architraves are installed. Openable windows, what a joy! Ventilation, here we come.
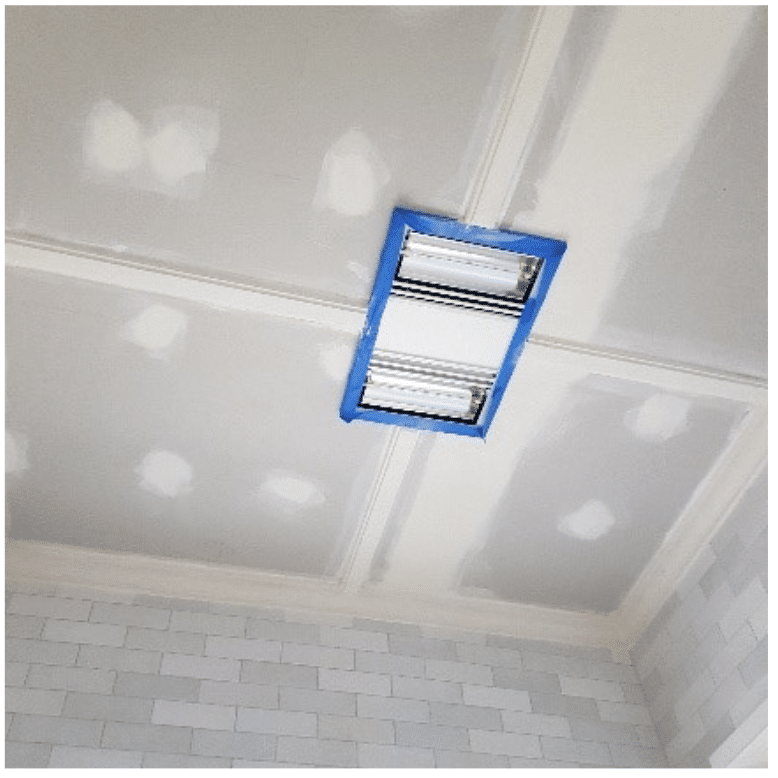
We also had to address the original ceiling. It was shored up with screw fixings and a new sheet applied. The new tastic could not be perfectly centred due to beams, so I had to rethink the ceiling pattern I had drawn… another reason to hire a designer to be on-site while these important decisions are made and dilemmas resolved.
Material Deliveries & A Warning

Spoiler alert! The framing for the shower ceiling is ready! It was built on site and took way longer than expected. I thought it would get knocked together in an hour or so, but I wasn’t living in reality. We often think craftsmen (and designers) will do it in a jiffy, but good things take time, even when experts are doing it!
Then, it was a tyrant of a thing to install (you can imagine the words really used), but it arrived and was perfect, and that’s what matters. Then… the tiles arrived and we had some momentary drama…
Before I tell my tale, be warned: ORDER YOUR TILES EARLY, before you even start your project, just to be safe.
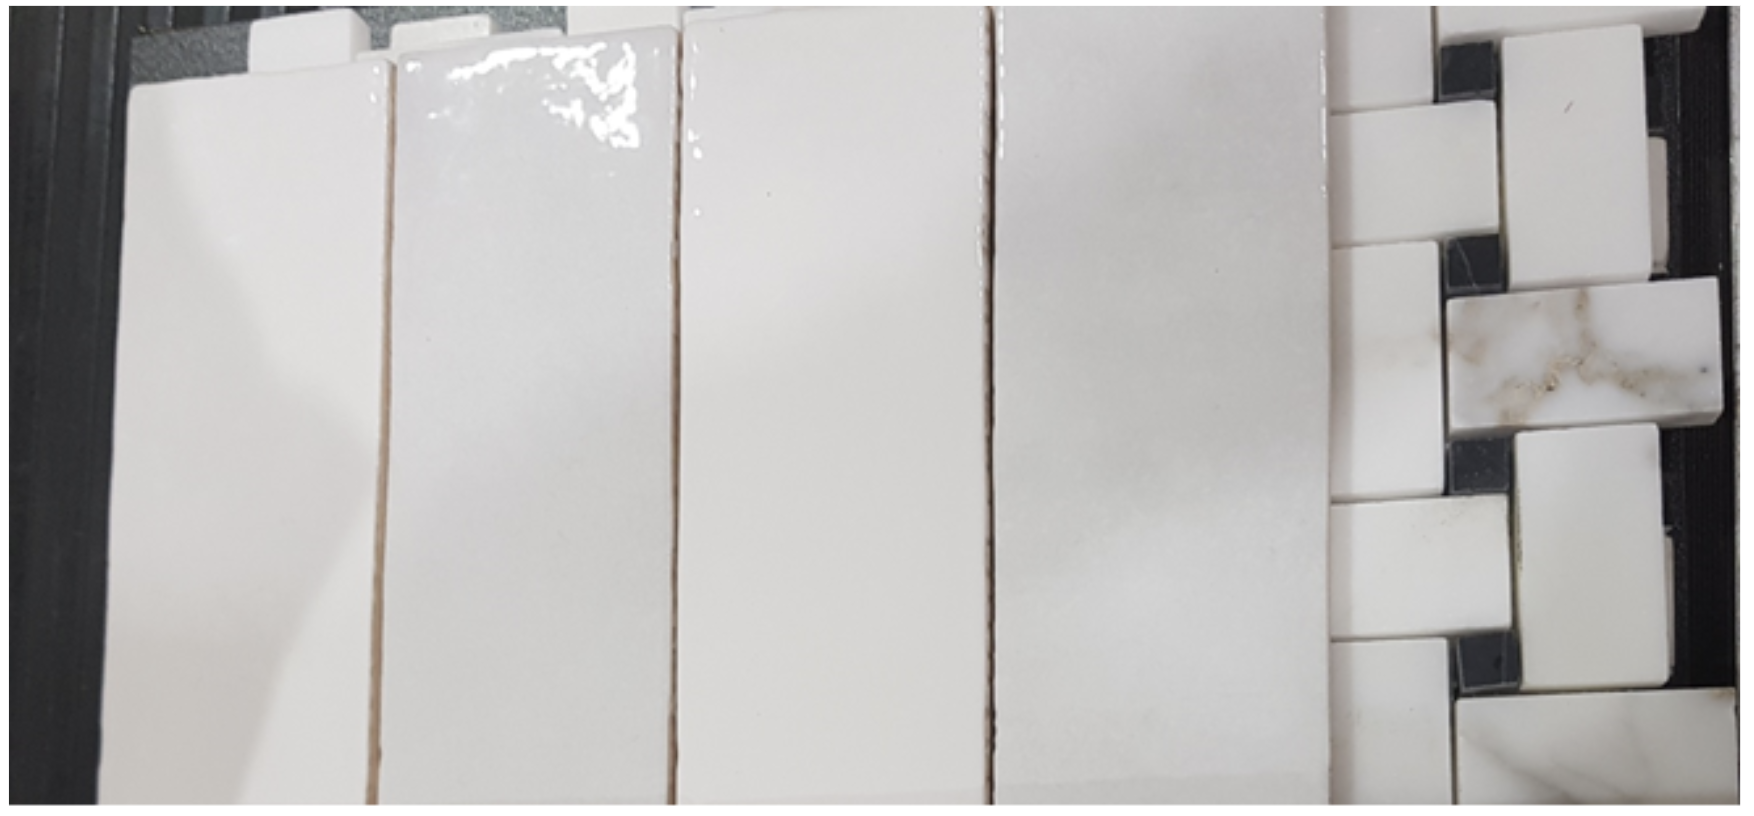
Here’s what happened. When they arrived after 3 months lead time, both the floor and wall tiles were slightly whiter and greyer than the more ivory samples I had. Professionally, I would consider this an acceptable batch variation, but if you recall my earlier blog, I’d been carrying around the perfect ivory white tile sample from Boston for 6 years waiting to get the right tile here.
It was quite funny, because the builders played a trick on me, holding the original sample and a new tile to see if I could guess correctly which was which — to them, they looked the same! Of course, for me, with decades as a design professional and as the self-proclaimed champion of the 6-year tile carrying award, I could get it right every time.
BUT what to do? Hold up the job? No way, Jose! I still very much liked them, and fortunately, both floor and wall tiles were whiter, so it wasn’t like I had one cream and one white one, so proceed we did! Done is better than perfect, and sometimes you have to make judgement calls. (Again, better to have a design professional to help you make those hard decisions.)
Fortunately, the bathroom turned out great, as you will see in a future post. Next up: prepping the tiles.
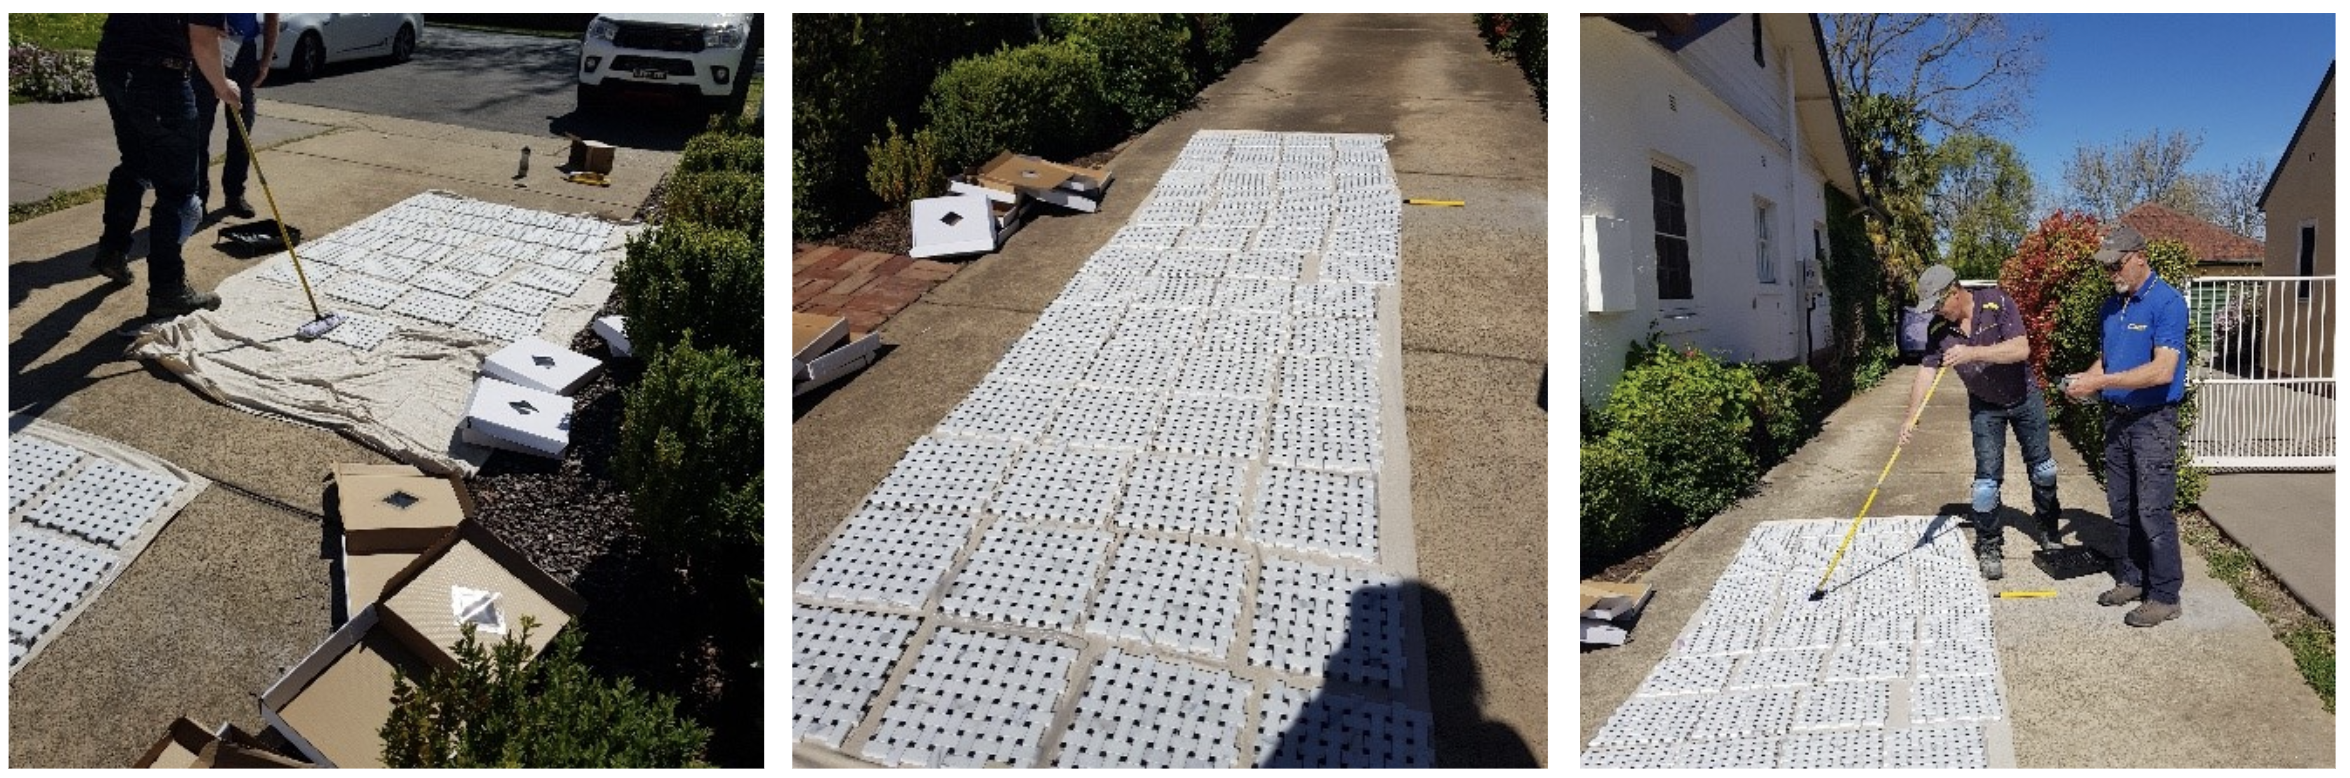 The floor tiles are marble and required sealing. Thankfully, we have a lot of driveway so the tiles were set out here and sealed by Paul the Tiler and Shane the Builder. These are better sealed outside, where there is space and ventilation.
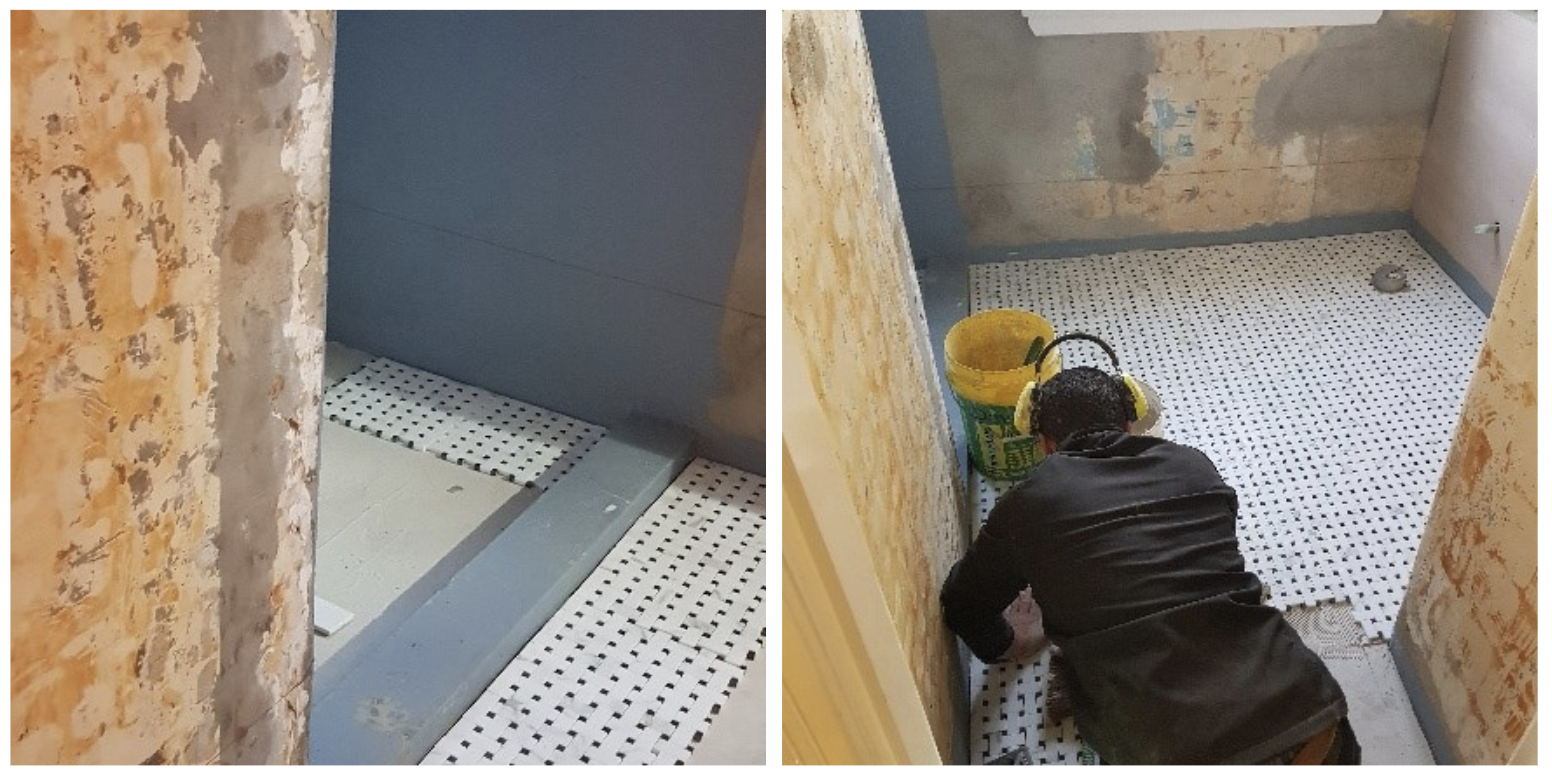 Floor tiling begins! And then the wall…

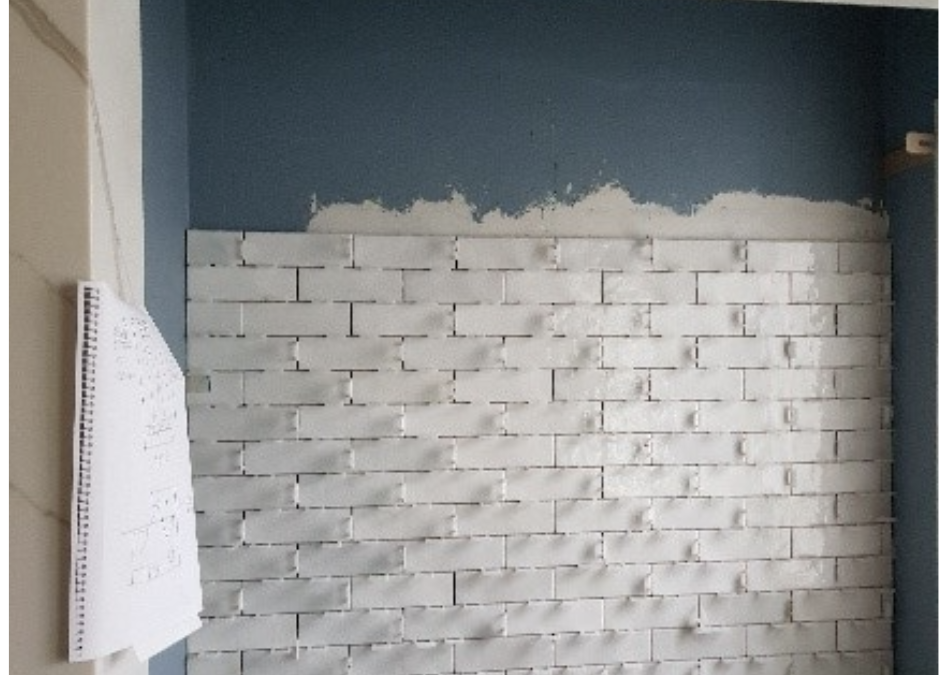
It’s all coming together beautifully. I can’t resist sharing a mini paint colour lesson…
Notice how the darker blue of the waterproofing colour seems to recede into the wall? That’s what darker colours do, they push the wall away, NOT toward you. Most people assume that dark colours make spaces look smaller, but the opposite is true!
We’re now getting very close to the final reveal, so I will stop here for today. My next post — I PROMISE — will share a final look at what we achieved through all of our dreaming, designing, planning, demo’ing and construction.
For interior design help with your own bathroom renovation, our services range from getting expert advice for the DIY designer to full-service, done-for-you bathroom design. Feel free to book a chat with me to see if our services are right for you and your project.
Bye for now!
Nadine
This is blog 4 of 8 in the Bathroom Renovation series. Click below to navigate through the series.