PROJECT: LUXURY REID BATHROOM
In our latest bathroom renovation, we discuss design constraints and how to blend heritage elements with modern amenities. The aim was to create functional spaces that elevate the existing bones of this heritage home, whilst moving with the technology and style of the times.
We discuss the common design constraints that appear in heritage homes, or when working within existing layouts. A design constraint is when you must work with something you can’t change, and every project has them.
As we step into a new year, the prospect of transforming our living spaces becomes an exciting and achievable goal. Whether you dream of an updated kitchen, a relaxed new living room, or an entire home makeover, planning is the key to success. In this blog post, we’ll go ahead and explore the essential steps to plan and schedule a renovation that aligns with your vision, needs, and budget.
The Brief
Our clients recently purchased one of the best homes in inner Canberra. Knowing that the bathroom had a leak, they knew they would need to complete a bathroom and laundry renovation. The bathrooms main occupants would be the couples two teenage daughters, and would also accommodate guests.
The client was after a sophisticated bathroom design with luxury elements throughout, that maximised space and incorporated modern amenities whilst complimenting the homes existing 1930’s style.
The Constraints
For the bathroom door and hardware to remain consistent throughout the rest of the home, we kept these elements too. Electrical point positions were considered and kept, though I am not opposed to spending money moving these when needed, to optimise functionality.
Spatial Planning Goals
Once engaged, we started with a site visit to better understand the client’s needs and to measure the space within an inch of its life. Another aspect of the site visit is to ascertain functionality goals. Understanding who, how, and when a space is used helps me to create an ergonomic and spatially functional design.
In this project, my client had several spatial goals:
- To install a toilet into the space whilst keeping the bath.
- To have twin basins for her daughters – the bathroom’s primary inhabitants.
- Secondary inhabitants are anyone who wants a soak in the tub.
- Convert the separate toilet to a mini powder room for guests.
I won’t lie and say these goals didn’t present a design challenge, but challenge accepted. This is where measuring is crucial. Drawing the original space to scale is a great place to start.
A note from the client…
Nadine actively listened to our needs and brought her wealth of expertise in specifying unique tapware, bespoke cabinetry, and design concepts for mirrors and wall fixtures to deliver the sophisticated, bespoke and heritage look we were seeking…”
The window and different height walls did make this one a little tricky to measure.
Ceiling constraints and lighting plans are another consideration, often overlooked in a DIY project.
The trick was to choose a bath that would leave enough standing room in front of the vanity. I plotted it out to show our client the spatial layout with both a small and a large tub option. I recommended a free-standing bath as it wouldn’t require a built-in platform, which would take up valuable space.
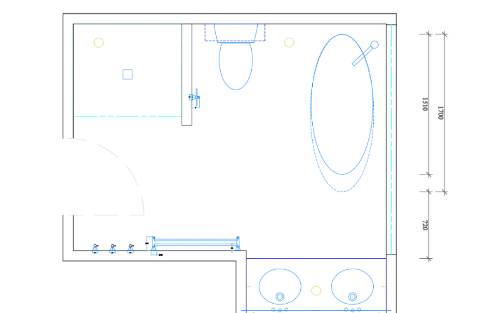
CAD floorplan shows the spatial layout considerations of the different size bathtubs.
Design Selection
The design is inspired by the elegance my client exudes. While she aims to stay true to the house’s aesthetic, our discussions reveal she’s not overly attached to recreating a 1930s-style bathroom, opting instead for a blend of classic and modern elements, with a soft touch of colour.
As we sift through product and inspiration images, it’s clear there’s a mix of traditional and contemporary ideas at play. In my mind, I envision a design that embodies glamour and character, finished with marble and gold accents.
Conceptualisation
When it comes to conceptualising, I believe in the power of gathering ideas rather than reinventing the wheel. It’s about presenting our clients with visuals that help them see the possibilities. Chances are, if you have an idea, there’s likely an image on Pinterest that can better help you convey what is in your head. Using already existing resources simplifies and speeds up the deliberation process.
With the floor plan settled and concepts clarified, we delve into the design development phase. Ensuring harmony among basins, tubs, and toilets is key, and I found pieces with similar curves to maintain consistency.
After some searching, I’ve narrowed down our choices to include egg-shaped sanitary ware that nods to modern tastes while still complementing classic elements. And, of course, marble takes centre stage.
Though initially drawn to a marble and brass mosaic, we’ve opted for coordinating marble tiles and borders after several tile shop visits until we found the perfect solution.

Fixtures and fitting constraints
You might be surprised to learn that even in premium tapware collections, not every style includes every type of fitting, which can be a source of frustration. This is particularly true in Australia, where limited market demand for higher-end products means compromises are sometimes necessary.
Additionally, supplier availability poses a constant challenge in the design process. From conceptualization to selection and installation, the timeline can span months. Failure to secure specified options on time can result in unavailability, necessitating redesigns that are both time-consuming and costly.
Gold tapware was an easy choice, as it worked in with the direction of the design and aesthetic of glamour the client was looking to incorporate.
A note from the client…
“Nadine brought energy and passion to the design and project, and was with us every step of the way – giving practical advice on suitability of products.I enlisted Nadine’s assistance starting with the “designer for a day” service, prior to booking for a full custom service.
Here, Nadine demonstrated her mastery of supply shops across Canberra, memorised all our measurements and commanded each supply shop – gaining us access to hidden gems in tiles, splash backs and cabinetry. We wanted our bathroom to be unique and include quality marble and gold and she masterfully achieved this.Nadine attention to detail was exceptional. She was able to recommend all the specifics for my bathroom to ensure a sophisticated finish, paying attention to such things as as orientation of tiles, edging for tiles, tone and texture of grout and proportions for lighting fixtures and mirrors.”
Documentation
At the completion of the design, my clients were presented with a comprehensive design brief and materials specifications to hand to their builder to begin the installation process.
What’s included in a documentation kit:
- Floorplans: All things design layout from a birds eye view. This demonstrates spatial planning and sets up the whole design.
- Drainage: Plumbing adjustments. In this project, this was documented to accommodate the new toilet placement.
- Reflected ceiling plan: Specifies elements above 1500mm, such as wall sconces, lighting plans, ceiling fans, light wells or vents.
- Tile setouts specify tile patterns and placements.
- Schedule of fixtures and finishes: these are the materials chosen to make the design come to life
- Wall elevations:
- Provides details regarding vertical surfaces, so for instance, the installation of wall tiling, the dimensions and installation points for towel rails or tapware etc.
- Joinery drawings: This specifies the dimensions, material and finish of any custom joinery required, including any hardware.
A note from the client…
“Having Nadine’s design expertise greatly assisted us to gain quotes (much more accurate with the itemised lists) and gave both us and the builder confidence that the finished design would present is as we planned and envisioned. I also really didn’t want to feel like I’d ordered stock standard fixtures or fittings – I was looking for the uniqueness the home deserved.”
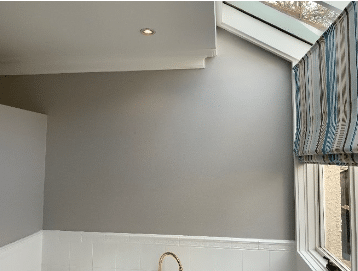
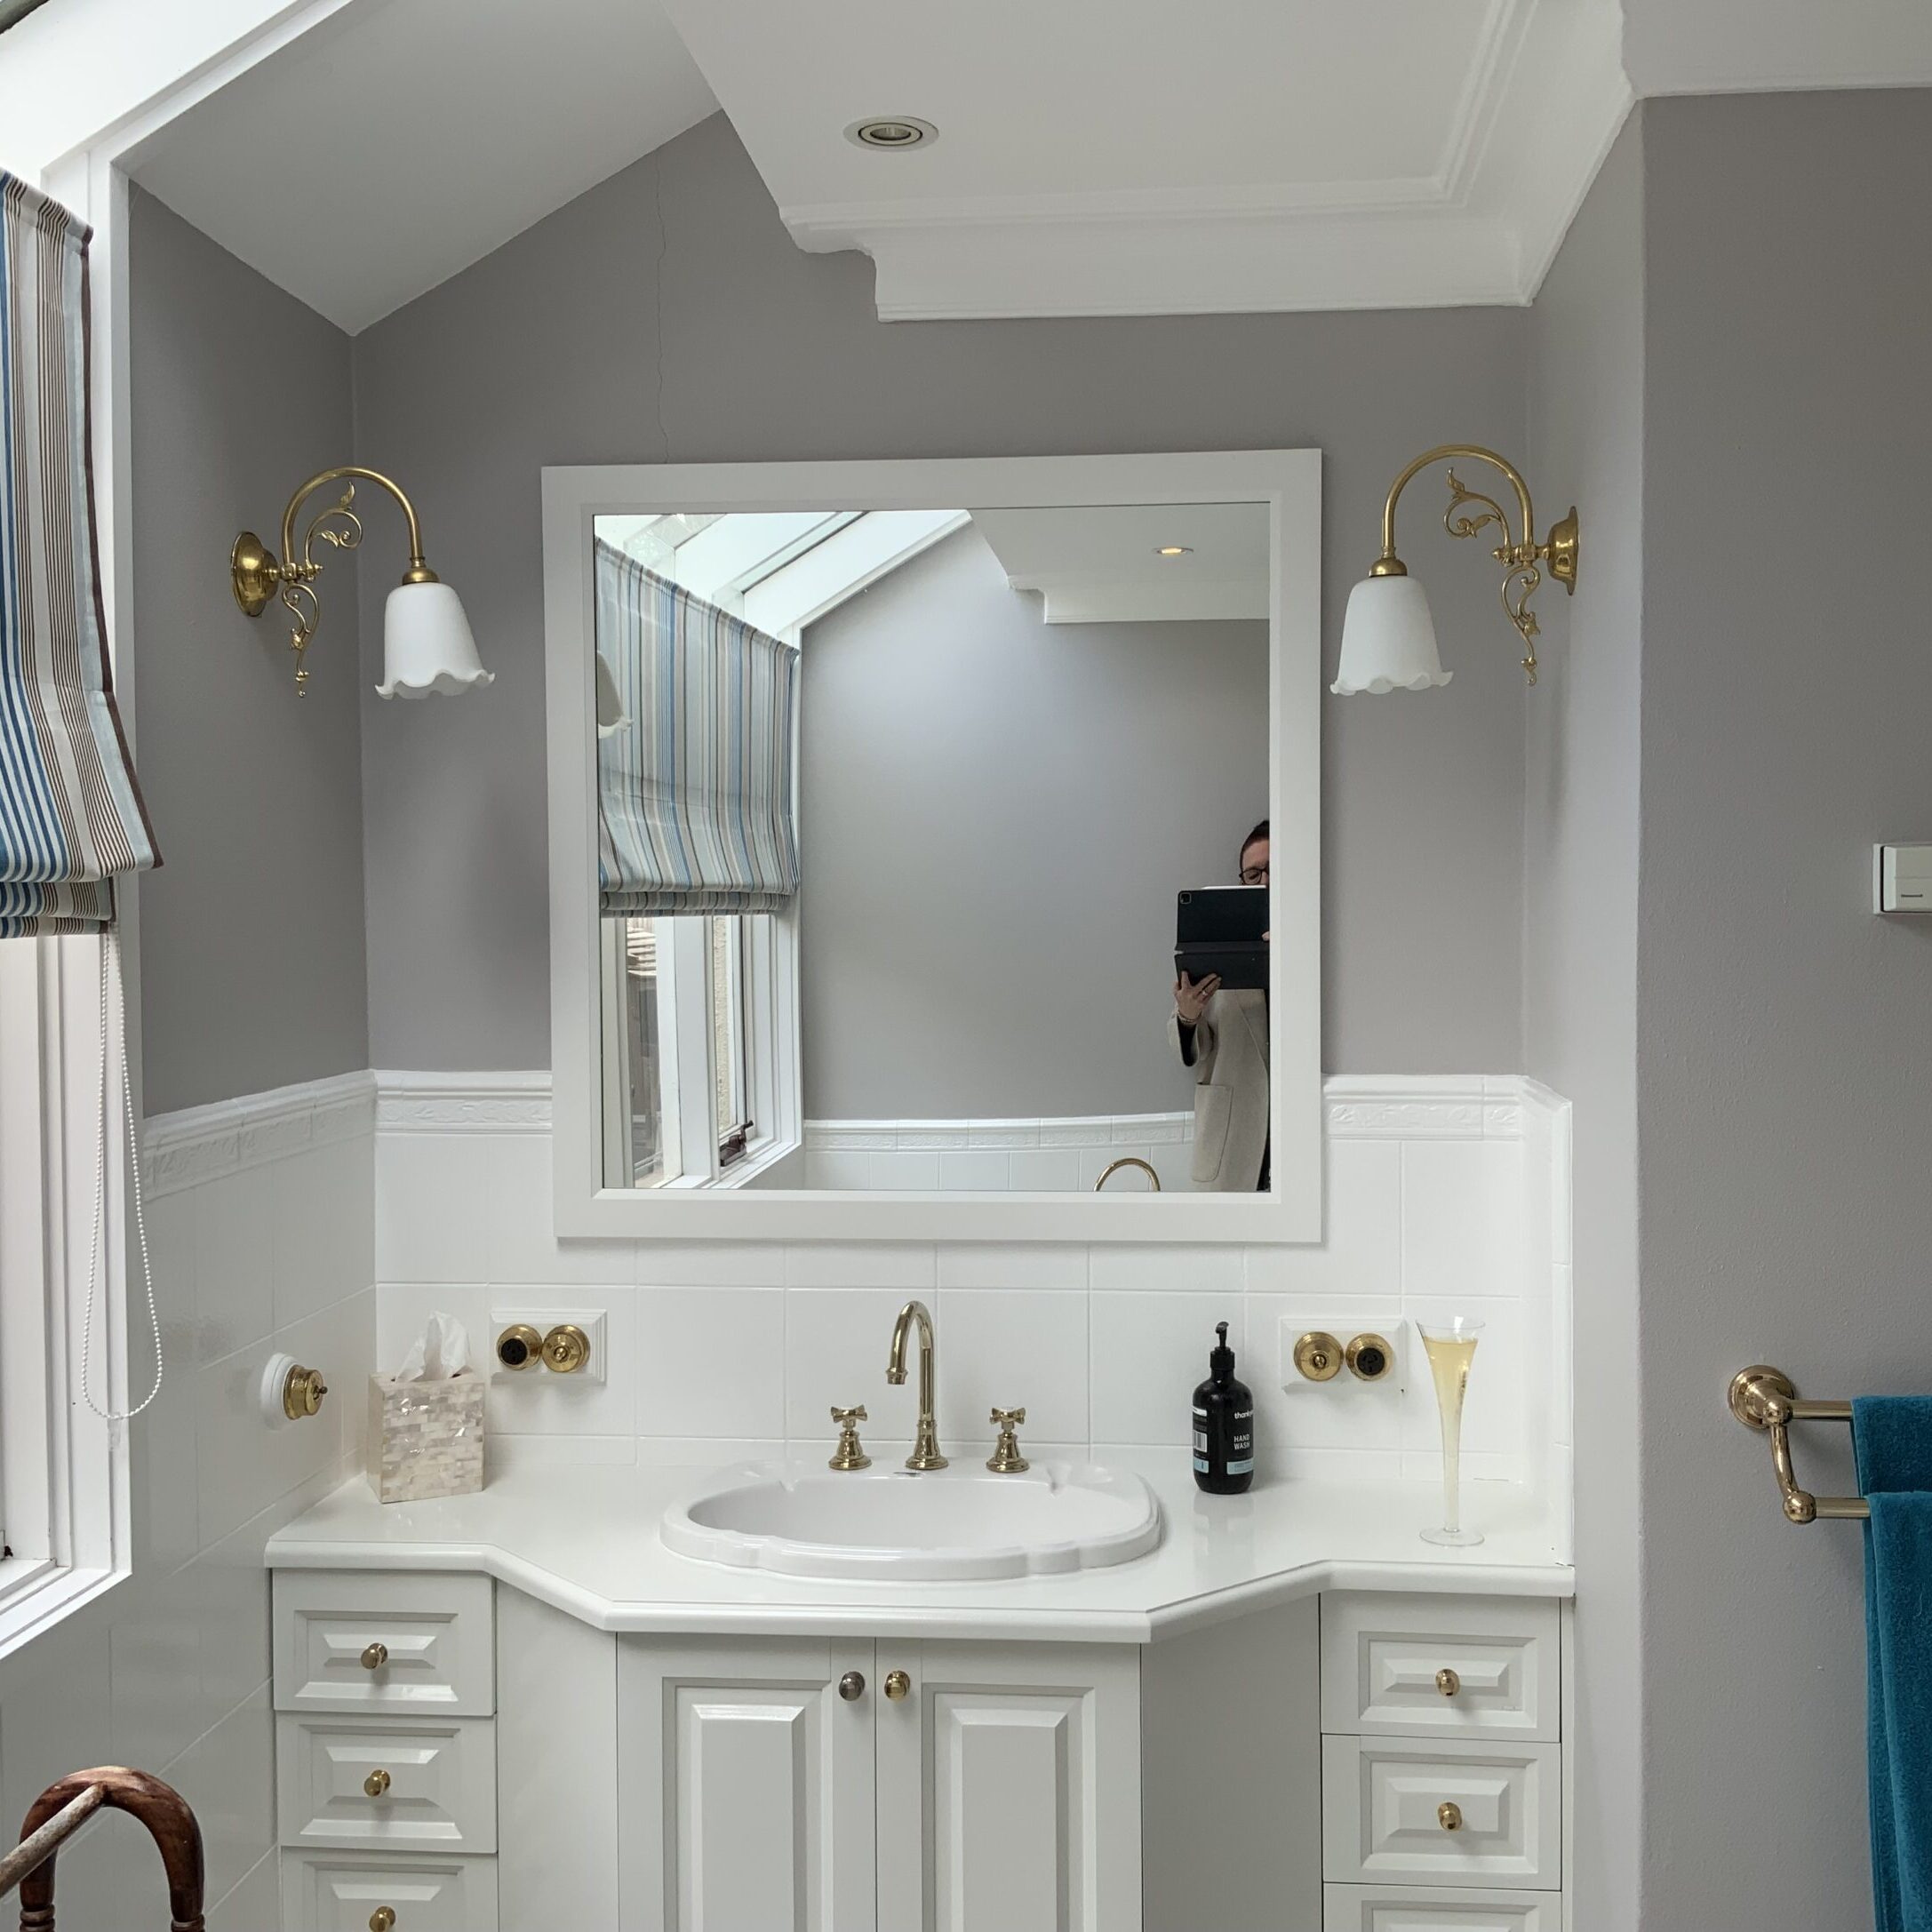
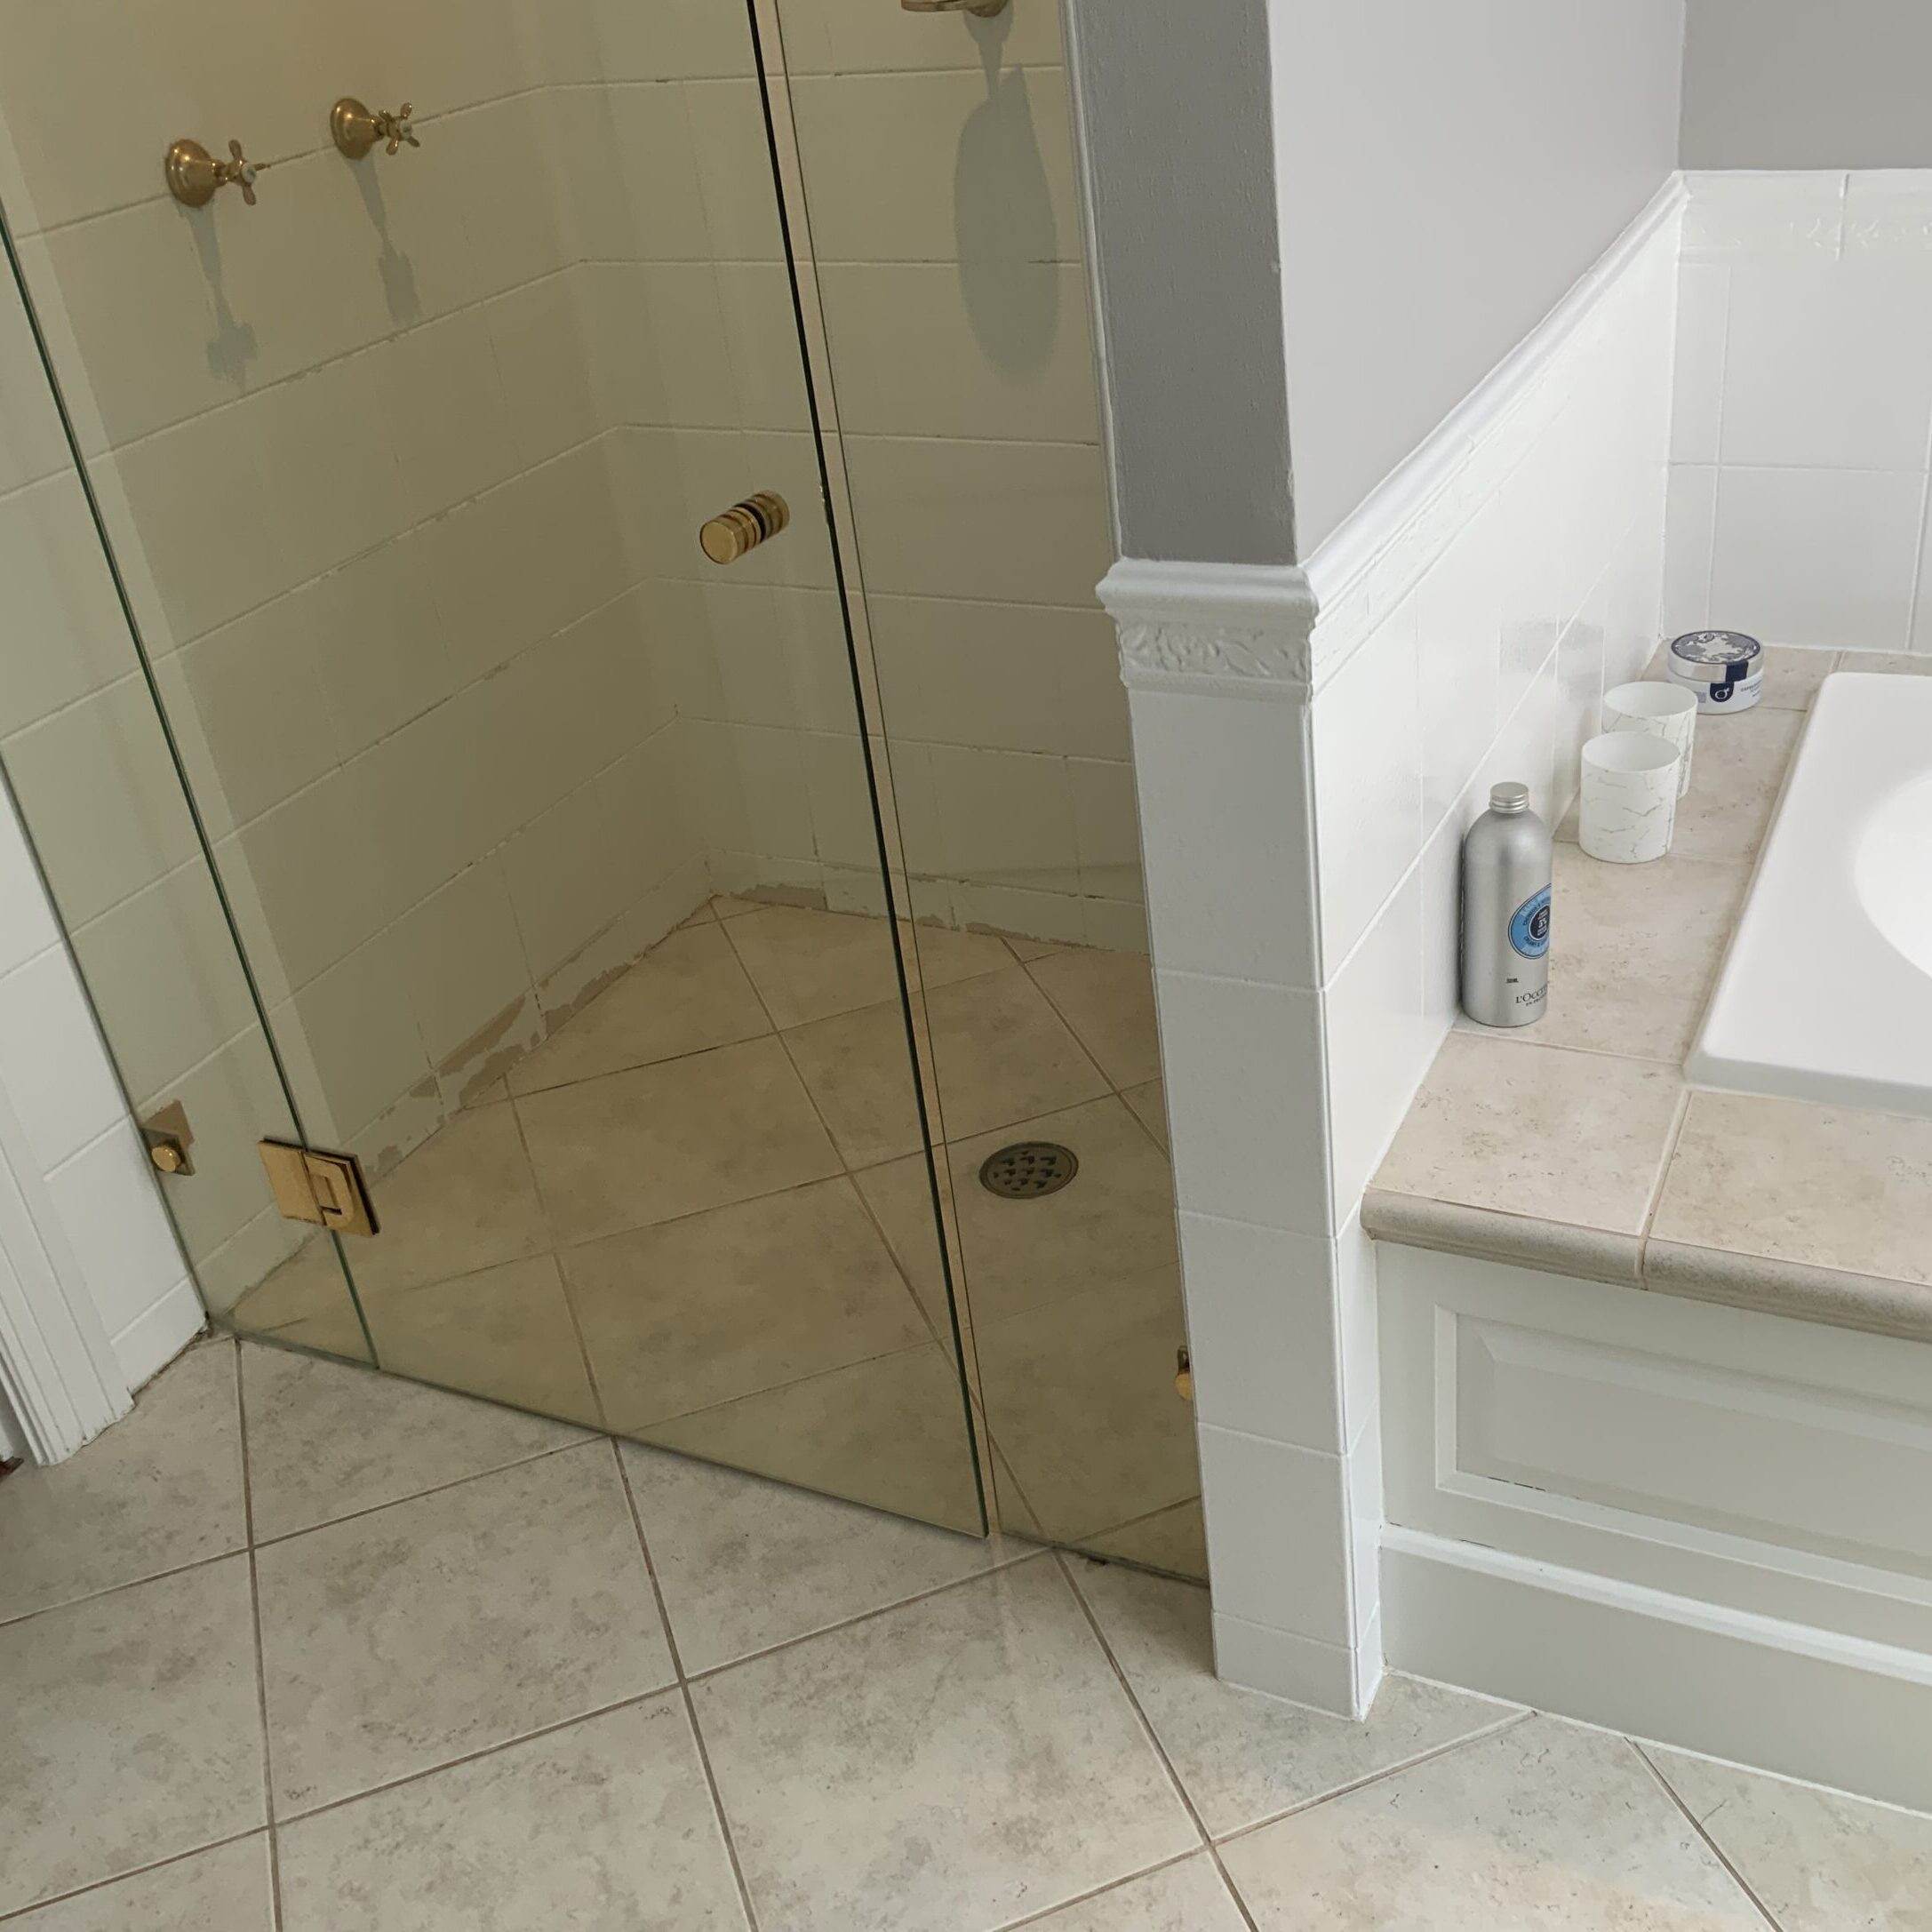
Before

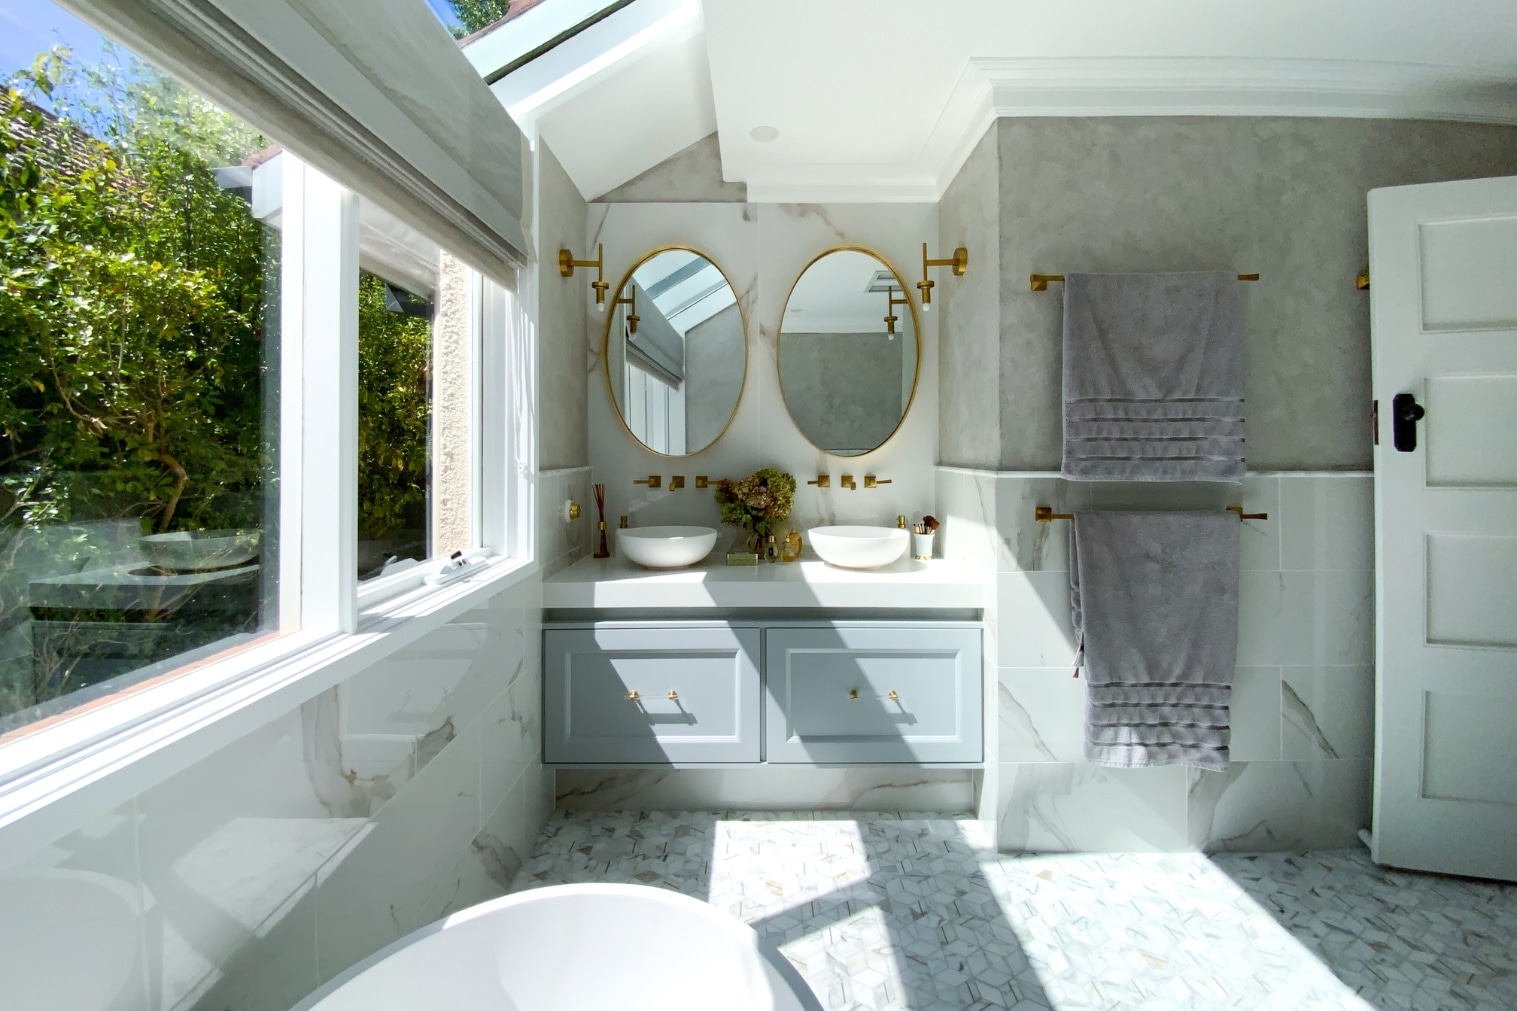
After
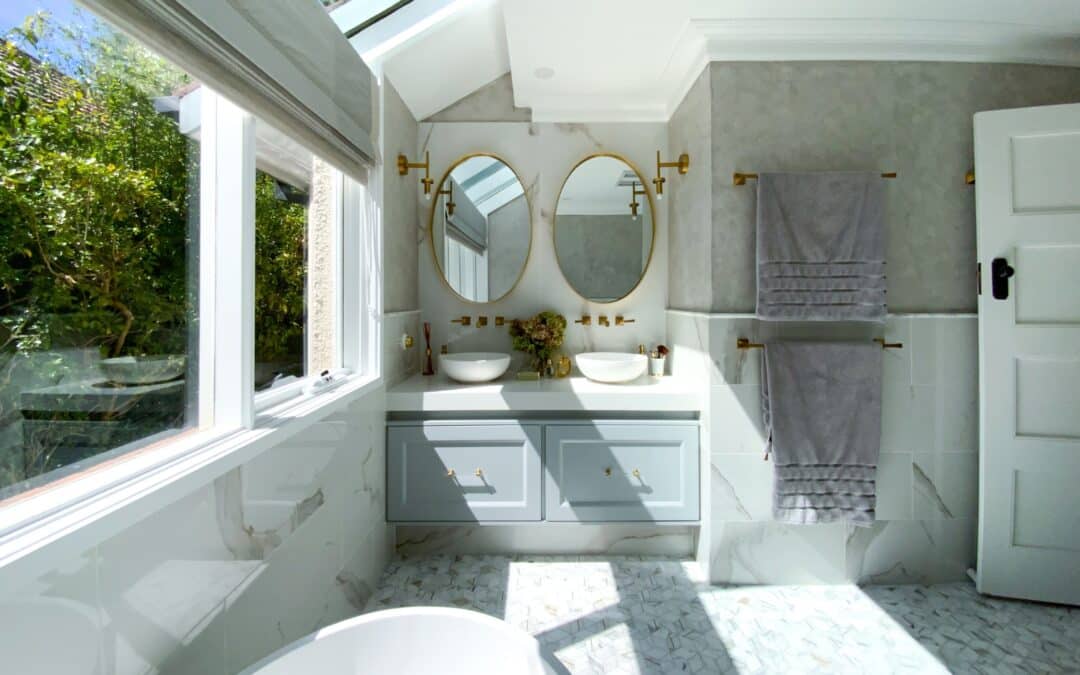
 The existing windows flood the room with light…
 Installing an additional toilet meant the existing separate toilet (just outside the bathroom door) could be adjusted into a powder room to accommodate guests.
 Gold hardware adds luxury and elegance, against the backdrop of marble…
 Twin basins were installed to accomodate for the couples teenage girls.
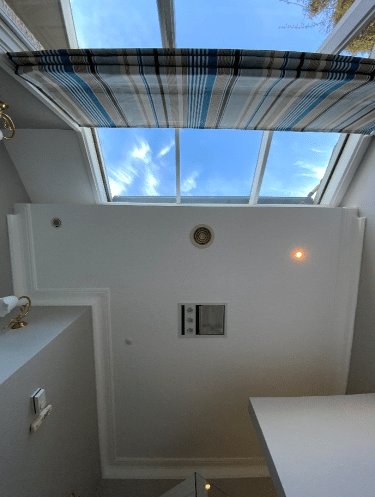
 A custom blind was designed and installed for privacy.

Basin elements…
 A short wall between the show and toilet was installed as a privacy screen that still allowed light into the shower.
Generous floating drawer space was installed to house bathroom items.